Windows Installer USB on macOS
The Windows installer is pretty finnicky. I have found that dd or restoring from Disk Utility usually doesn’t work.
The most reliable way to create a Windows installer is through the Windows Media Creation Tool
or through Rufus. However, neither of these tools are available on macOS. This method tries to
simulate how Rufus works. However, it is not perfect, and requires
DISM installation. I believe this is because the Windows installer is not designed to use exFAT, and macOS doesn’t
support writing to NTFS. This could perhaps work better on linux with an NTFS partition, but I have not tried it yet.
Creating the USB
-
Have your USB plugged in, and download the Windows ISO of your choice in your Downloads folder (in this case, it will be
Win11_22H2_English_x64v1.iso). -
Open Disk Utility:
-
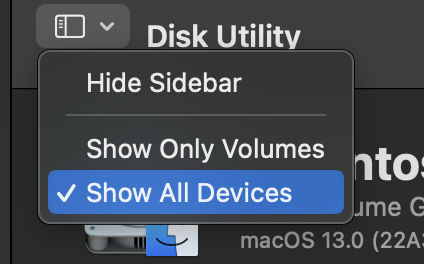
Under “View,” make sure “Show All Devices” is clicked
-
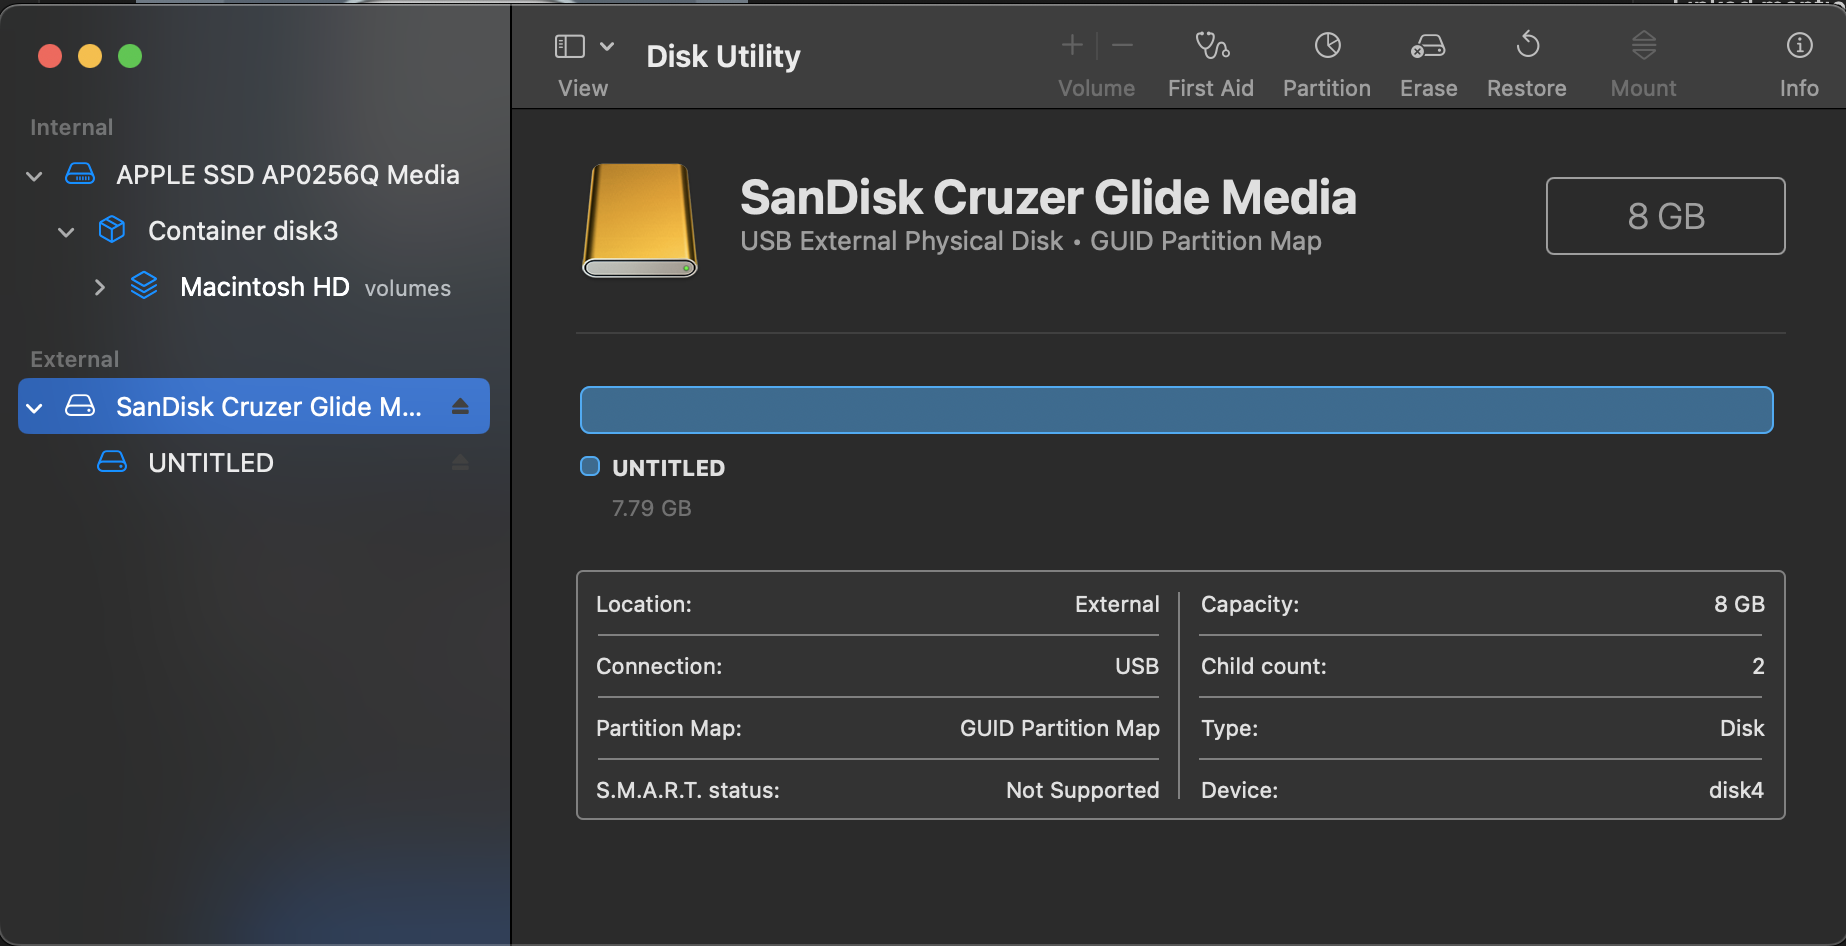
Find and select your USB drive in the sidebar. Make sure it is the device (the topmost one), not the volume.
-
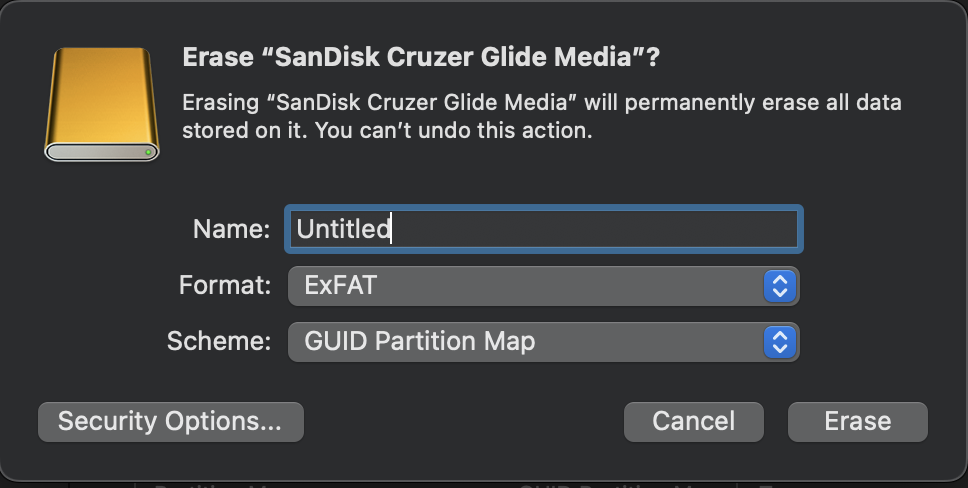
Click “Erase” near the top-left, and select the following options for Format and Scheme. You can name it whatever you want. Make sure you have selected the right drive and the right options. This will wipe all data on the USB drive. Wait till the erasing process is complete.
-
Download
uefi_ntfs.imgfrom here. You can click the “Download” button to download it. Once downloaded, control-click the file in Finder and then holdoption/alt. The Copy option will turn into “Copy uefi_ntfs.img as Pathname.” Click that, then the path will be copied.
-
Open Terminal, and run the command
diskutil list. You can run a command by typing/pasting it then pressingEnter. It should show something like this: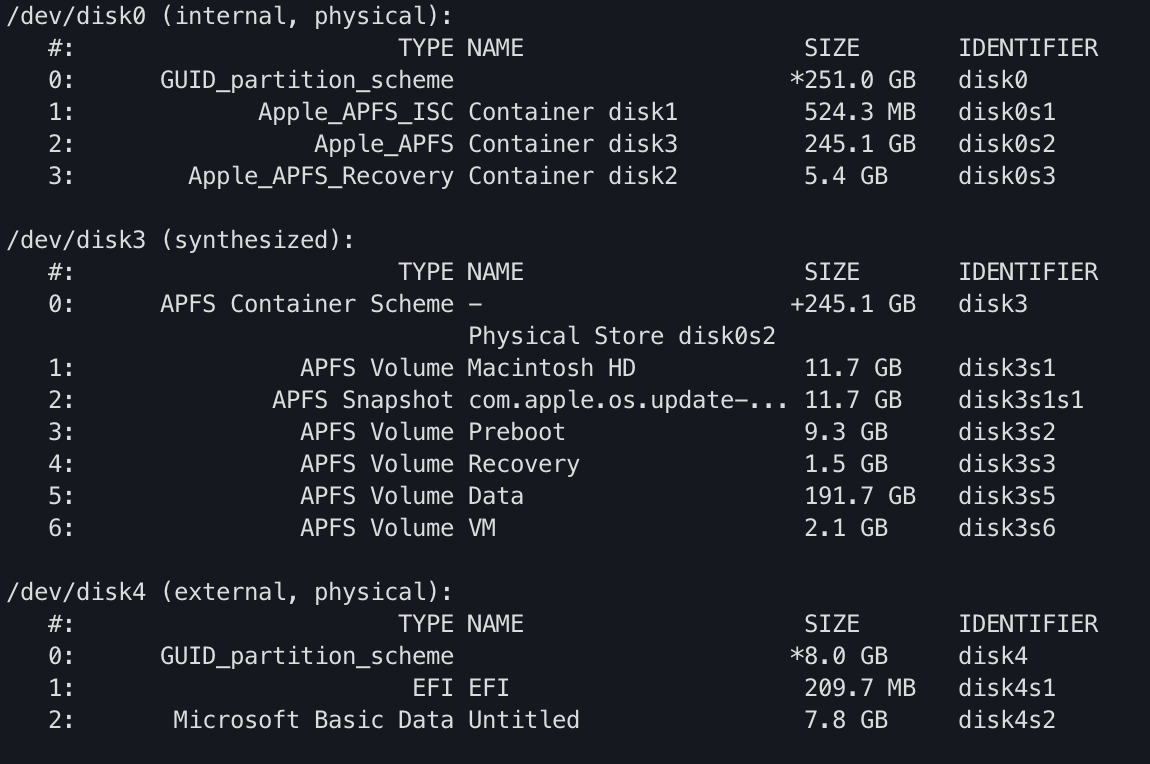
-
Identify your disk based on the size and it saying “external, physical”. In my case, it is
disk4. Confirm that it has two partitions, of type “EFI” and “Microsoft Basic Data.”
-
Run the command
sudo dd if=<pathname> of=/dev/r<disk identifier>s1 status=progress, replacing<pathname>with the path you copied in step 5 and<disk identifier>with the identifier you found in step 7. Therin the device puts it in raw mode, which makes it faster. You will need to type in your password (the letters won’t show up while you are typing them).
-
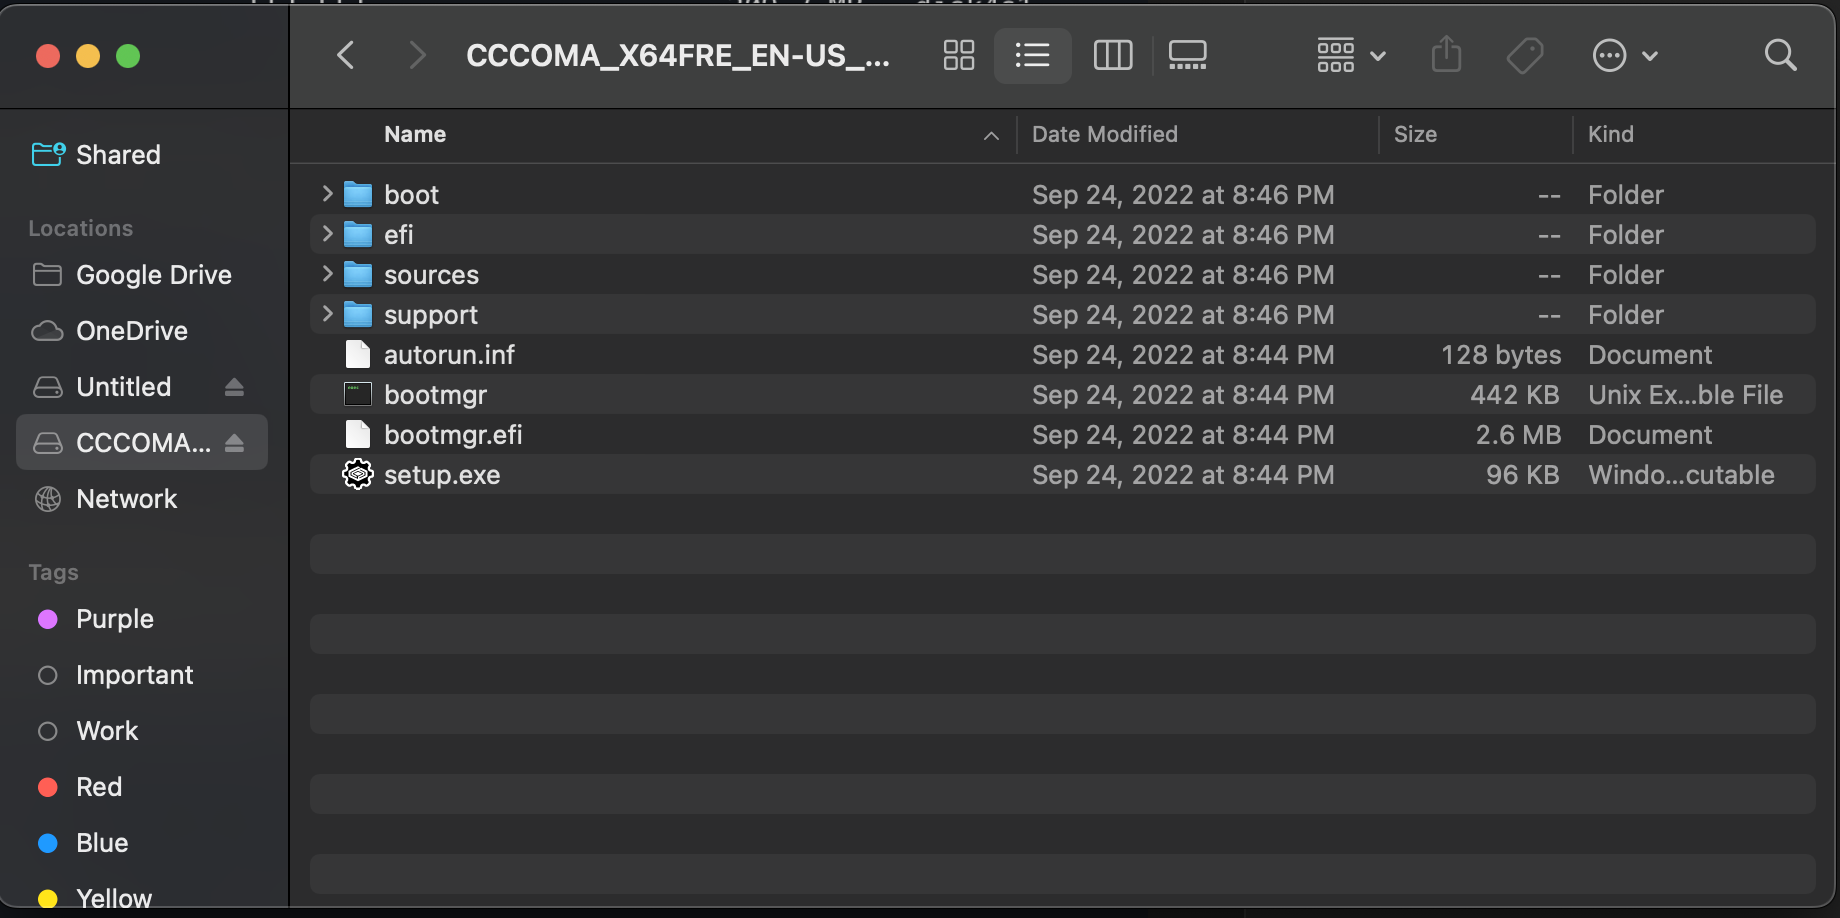
In Finder, double-click the Windows ISO file to mount it. You then should be able to navigate to it in Locations.
-
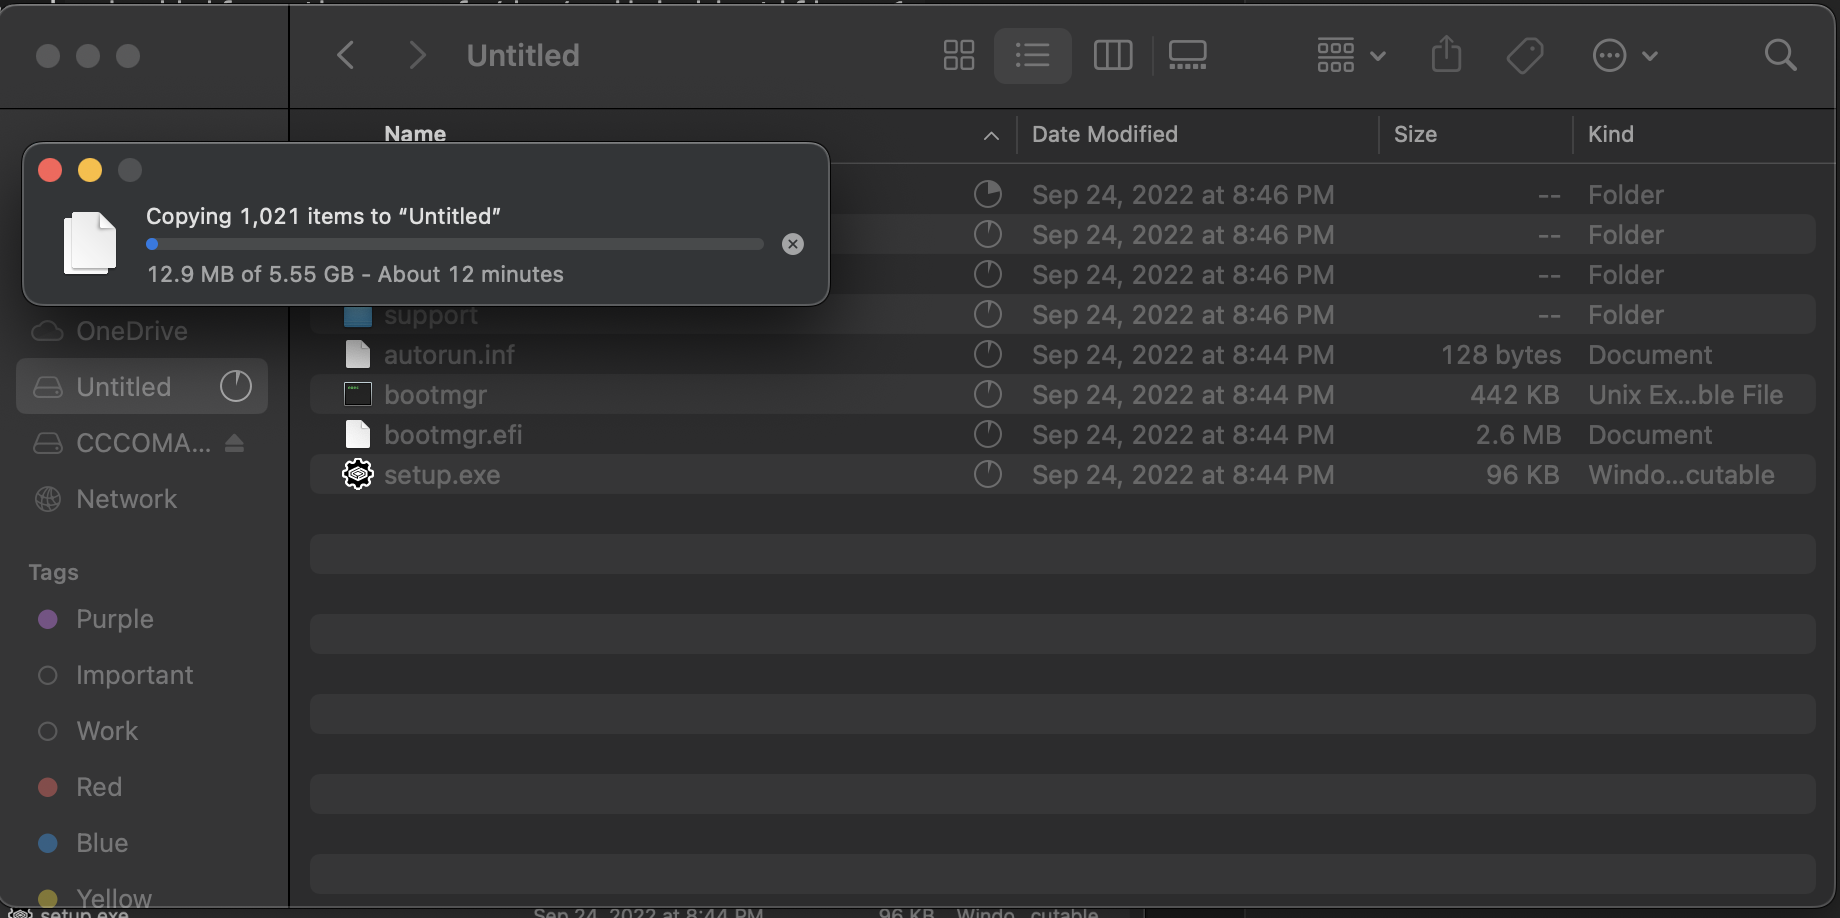
Select everything, then drag it to your volume (in this case mine is Untitled).
-
Eject the drive.
Installing
You may find this guide from Kari Finn easier for this section if you are uncomfortable with using diskpart.
-
Physically remove all disks other than the USB drive and your boot drive from the computer to help with identification. You probably will also need to turn off Secure Boot, though this can be turned back on after installation. Then, boot from the drive and start installing it normally. When installing, you will probably get the following error:

-
Press Shift + F10 to open the command prompt in the windows installer, then run
diskpart.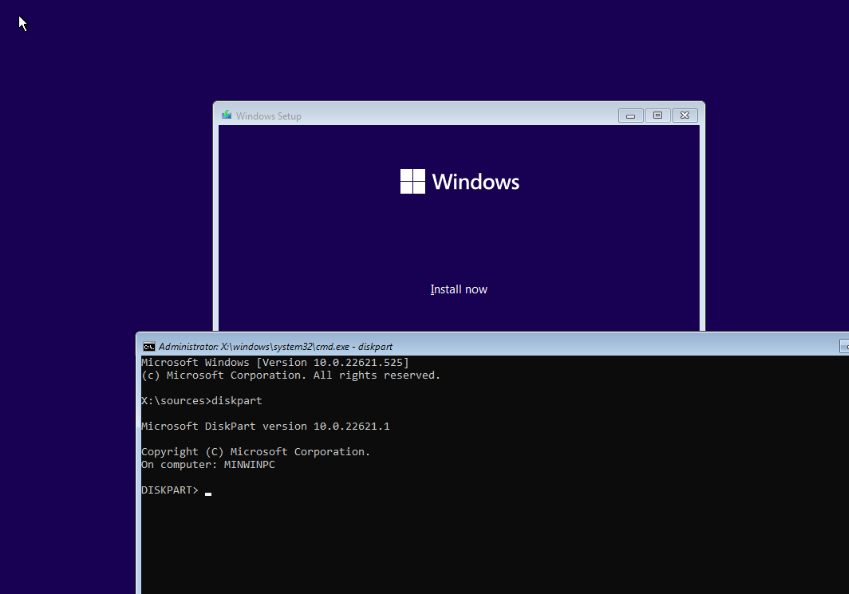
-
The partially completed automatic installation we just did created our drives for us. Run
lis volto confirm our drive letters. The exFAT partition (in this caseC), will be our USB drive, the large NTFS partition (in this caseE) will be our root partition, and our EFI system partition will beD. This is pretty confusing, since the root partition is normally C, but in this case it’sE.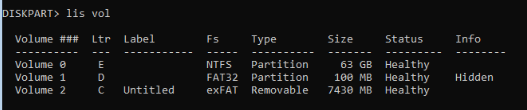
-
Leave diskpart, then run
cd /d <drive letter>:\sourceswhere<drive letter>is your USB drive/exFAT partition.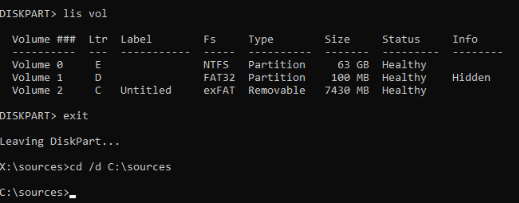
-
Run
dism /get-imageinfo /imagefile:install.wimto view the available editions. If it shows an error about the image file not being found, you are on the wrong drive letter. In this case, I want to install Windows 11 Pro, which is index 6.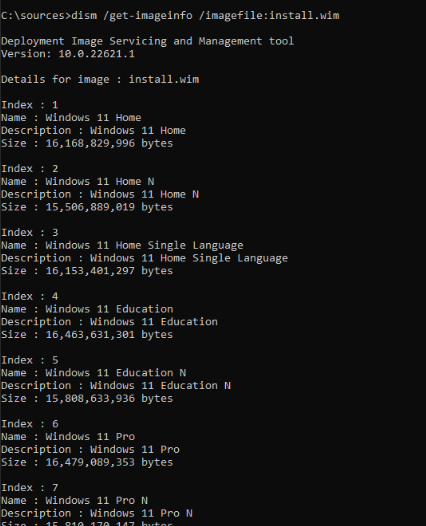
-
Run
dism /apply-image /imagefile:install.wim /index:6 /applydir:E:\, substituting the index for your desired index and the applydir for the drive letter of your main partition.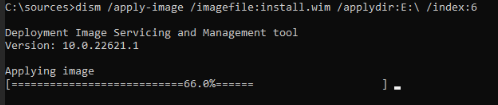
-
After it is complete, run
bcdboot E:\Windows /s D:, again substitutingE:with your main drive letter andD:with your ESP drive letter:
-
Reboot using
wpeutil reboot. You can also turn secure boot back on at this point.
Rocky Linux with Cloud-Init